

AUDAX RIDING · VISITOR EDITION
Your First Brevet in Japan
Japan rides on the left, turns right in two stages, and puts a 24-hour convenience store at every control. This guide covers the road rules, signs, gear requirements and train etiquette that surprise visiting randonneurs the most — so the only hard part of your 200 km (or 1,200 km) is the riding.

KM
0.0
Japan drives — and cycles — on the left. Bicycles are legally vehicles (keisharyō), so your place is the left edge of the roadway, moving with car traffic. This will feel natural for riders from the UK or Australia and deeply weird for everyone else, especially at 3 a.m. on hour twenty of a 400.
Riding against traffic on the right side (gyakusō) is illegal, genuinely dangerous, and one of the few things that will make Japanese rivers honk at you. When in doubt after a stop or a turn: face the same direction as the cars in the lane next to you.

Stay in the leftmost through lane. Bicycles may not move into right-turn lanes or overtake into right lanes on multi-lane roads. If the left lane is painted as “left turn only,” a bicycle may still ride straight through it — lane-designation arrows are for cars, not for bicycles. Signal, hold your line, and go straight from the left edge.
Two corollaries of the left-edge rule catch out group riders in particular. No overtaking cars on their right: swinging out toward the centre line to pass slow or queued traffic puts you exactly where the law says a bicycle must not be. If traffic is stopped, either wait in line or filter slowly along the left edge, watching for opening doors and left-turning cars. If it’s moving, hold your position and be patient — on a brevet you have hours, not seconds.
No riding two abreast: this is not club etiquette but national law — it prohibits light vehicles from riding side by side. A special 並進可 (“two-abreast permitted”) designation once existed, but the last of those signs were removed by 2018, so in practice riding abreast is always prohibited on public roads today. Riding side by side to chat — normal in many countries’ club culture — is a violation here.

KM
12.4
Do not turn left on red
Here is the rule that surprises almost every visitor: bicycles never turn right the way a car does. No merging to the center, no right-turn lane, no sweeping arc across the intersection. Instead you make a hook turn in two stages:
1) Cross the intersection straight ahead, hugging the left edge.
2) Stop at the far corner and rotate your bike 90° to face your new direction.
3) Wait for that road’s signal to turn green, then proceed straight — you have now “turned right” without ever crossing moving traffic.

Drivers and cyclists from countries with a “turn on red” rule (such as right-turn-on-red in the US) sometimes assume the equivalent applies here — since Japan drives on the left, that would mean turning left on a red signal. It does not. Japanese traffic law has no general permission to turn on red in any direction. A red light means stop and wait, full stop, regardless of which way you intend to turn. The only exception is where a specific sign or supplementary plate explicitly permits a left turn on red at that particular intersection (marked with a plate reading 「左折可」, sasetsu-ka) — and these are very very rare, so don’t assume one applies just because the intersection looks quiet. Treat every red light as a full stop unless you can actually see that plate posted at that specific corner.
KM
31.0
You don’t need to read Japanese to ride here, but a handful of signs do most of the work on a brevet. The most important is not a sign at all but a small white plate mounted under one: 自転車を除く (jitensha o nozoku, “except bicycles”). It exempts you from whatever the sign above it prohibits — one-way streets, no-entry roads, time-restricted zones. Route designers love these streets because they’re quiet shortcuts cars can’t use.
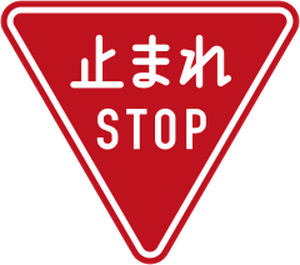
止まれ — Stop
tomare
An inverted red triangle, not an octagon. A full stop is legally required — foot down is the safe habit. Also painted on the asphalt.
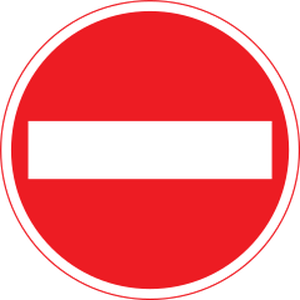

車両進入禁止 + plate
no entry · except bicycles
Red circle with white bar = do not enter. The white plate below says
bicycles are exempt. No plate? Then it applies to you too.

一方通行 — One way
ippō tsūkō
Horizontal blue rectangle, white arrow = one-way for vehicles, in the arrow’s
direction. Often paired with the 自転車を除く plate, letting bicycles ride both
ways — check for the plate first.
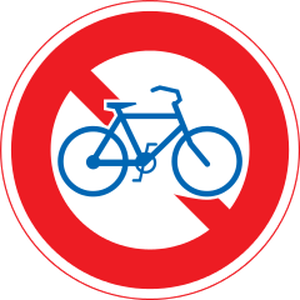
自転車通行止め
jitensha tsūkō-dome · no bicycles
Red ring and slash over a bicycle: bicycles may not enter.
Found at some tunnels, bridges and bypasses — the route sheet will detour you.
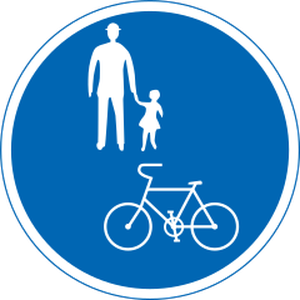
歩行者・自転車専用
bicycles & pedestrians only
Blue circle with a pedestrian and a bicycle: a shared path for people on foot
and bikes. Ride slowly and yield to pedestrians — they always have priority.
自動車専用
jidōsha-sen’yō · cars only
White car in a blue circle = expressway / motor road, no bicycles.
Looks like a normal ramp and GPS loves to route you onto it — your cue sheet never will.
Regulatory signs follow shapes you already know: red circle = prohibition, blue
circle = permission/obligation, inverted red triangle = stop. When you see any
prohibition, scan below it for a white plate — that’s where your exemption lives.
KM
52.7
Two full-stop rules are enforced far more strictly in Japan than most riders expect, and both are classic brevet disqualification stories:
止まれ (stop) signs and markings. Rolling through at 5 km/h does not count. Police run checkpoints at notorious intersections, and a ¥5,000–7,000 class fine now applies to cyclists under the “blue ticket” system introduced in 2026.
Stop, look, then go.
Just as important as the red triangle is the word painted on the road. In your lane you’ll see 止まれ (tomare, “stop”) painted large and vertically, reading toward you. Just beyond it, closer to the junction, is a thick white bar — the stop line.
Stop with your front wheel behind that bar, not level with the text.
The painted word itself is only a “supplementary” marking, but a real 止まれ sign is almost always mounted right there, and that sign is binding.

Railroad crossings (踏切, fumikiri). Every vehicle — bicycles included — must stop before the tracks and check both ways, even when the barrier is up and no train is in sight. Rural brevet routes cross dozens of these. Organizers post marshals at crossings on some events precisely because riders from abroad blow through them.

Riding after any alcohol (zero tolerance — save the victory beer for after the finish check), holding a phone or earphones in both ears while riding, and umbrellas in one hand (you’ll see locals do it; you should not).
KM
68.3
Japan is unusual: riding on the sidewalk is sometimes legal. You may use a sidewalk when the blue pedestrian-and-bicycle sign permits it, or when the roadway is genuinely unsafe (construction, parked-car walls, a truck-heavy tunnel approach).
Locals on mamachari city bikes ride sidewalks constantly — don’t copy their speed on a loaded randonneuse.
On any sidewalk: ride at a near-walking pace, keep to the roadway side, and give pedestrians absolute priority — if it’s crowded, dismount and walk. Ringing your bell at pedestrians to clear a path is prohibited; the bell is for
danger and for spots marked 警笛鳴らせ (sound horn), mostly blind mountain curves.
On course you will almost always be on the road anyway — it’s faster and legal.
The sidewalk option matters at urban starts/finishes and when the cue sheet routes you along a busy national route where a parallel cycling path is signed.
KM
95.1
Japanese law requires a front light, a rear light or reflector, and a bell on every bicycle at night. Brevet rules go further, and Japanese clubs check gear at the start line more rigorously than many riders are used to:

Typical Audax Japan / club requirements: two front lights (one as backup, both mounted), rear light in steady mode (blinking-only setups are commonly rejected; many clubs want two rears), a reflective vest or sash worn over everything at night — a reflective jersey print doesn’t count — plus helmet and bell. Ankle bands are warmly recommended.
Rules vary slightly by organizing club, so read the event page; “no vest, no start” is taken literally.
Rural brevets thread long, narrow, loud tunnels. Lights on before entering (some riders keep the rear light on all day for this reason), hold the left edge, and don’t stop inside. If a sidewalk ledge exists and traffic is heavy, walking it is a legitimate choice.
KM
121.6
In Japan the humble konbini (7-Eleven, FamilyMart, Lawson) is the backbone of randonneuring. Most controls (“PC” on the cue sheet) are simply a named convenience store: buy anything, keep the receipt — the printed store name and timestamp are your proof of passage. Guard those receipts like your brevet card; a zip-lock bag per event is the local ritual.

Konbini etiquette keeps this system alive: park clear of the entrance and car spaces, don’t sprawl kit across the storefront, take your trash with you or use the store’s bins only for what you bought there, and keep voices down at night — these are neighbourhood stores, and clubs lose permission to use them when riders behave badly. Note that public trash cans barely exist in Japan; a stuff-sack “trash pocket”
is standard randonneur kit.
Cards and IC transit cards (Suica etc.) work at every konbini chain, but carry ¥5,000–10,000 in cash for rural vending machines, small restaurants, and the occasional cash-only mountain café. Vending machines every few kilometres — hot drinks in winter, cold in summer — are your secret support crew.
KM
158.9
Getting to a start in the countryside usually means a train — and here is the rule with no exceptions: your bicycle must be fully enclosed in a rinko bag (輪行袋) to enter any station. Not a wheel poking out, not a saddle used as a handle through a hole, not “mostly covered.” Fully bagged, from the ticket gate to the platform to the train.

The standard method: remove both wheels (front-wheel-only bags exist but exceed some size limits), strap them beside the frame, bag everything, and carry it by the shoulder strap. JR’s free luggage allowance caps total dimensions at 250 cm (L+W+H), which a two-wheels-off road bike fits comfortably.
Lightweight rinko bags (Ostrich and Mont-bell are the classic brands, ~¥5,000–10,000, ~300 g) pack down small enough to carry on the brevet itself — the traditional “bail-out” insurance on a 1,000 km ride.
Board the first or last car and stand the bag in the space behind the end seats; avoid weekday rush hours (roughly 7–9 a.m. into cities) entirely. On Shinkansen, the oversized-luggage seats at the car rear are the polite choice — reserve one.
Practice your bag-up at home: doing it the first time at 5 a.m. outside a station, pre-brevet, is a rite of passage nobody enjoys.
KM
184.2
Police (accidents, theft). By law you must report any collision, even a minor one — exchanging a shrug and riding on is not an option in Japan, and your insurance will require the police record.
Ambulance / fire. Free to call, interpreters can be arranged.
If you go down hard on a mountain descent, call first and worry about the brevet card second.
| ENGLISH | JAPANESE | SAY IT |
|---|---|---|
| Excuse me / sorry (all-purpose) | すみません | sumimasen |
| A receipt, please | レシートをください | reshīto o kudasai |
| Where is a bicycle shop? | 自転車屋はどこですか | jitensha-ya wa doko desu ka |
| Please call an ambulance | 救急車を呼んでください | kyūkyūsha o yonde kudasai |
| May I fill my bottle with water? | 水をもらえますか | mizu o moraemasu ka |
| Thank you very much | ありがとうございます | arigatō gozaimasu |
| Do you have any room tonight? | 今夜空き部屋はありますか | kon’ya akibeya wa arimasu ka |
KM
200.0
- Left side, left edge, leftmost lane and two-stage every right turn
- Single file only — never pass cars on their right filter left slowly or wait
- Full stop at 止まれ and at every railroad crossing foot down is the habit that saves you
- Look for the 自転車を除く plate before following a car prohibition no plate = it applies to you
- Reflective vest, 2 front lights, steady rear light(s), bell, helmet gear check happens at the start line
- Zip-lock bag for brevet card and receipts the receipt IS the control stamp
- Rinko bag packed (and practiced) no bag, no train — it’s also your bail-out plan
- Cash ¥5,000+, IC card charged, insurance confirmed 110 police · 119 ambulance saved in your phone
- Carry your trash, park neatly, ride quietly at night the konbini clerk at 3 a.m. is part of the team
That’s the whole trick. The roads are smooth, the drivers are patient, the
climbs are honest, and somewhere around hour eighteen a vending machine will sell
you a hot can of corn soup that tastes like a miracle. Bon courage!